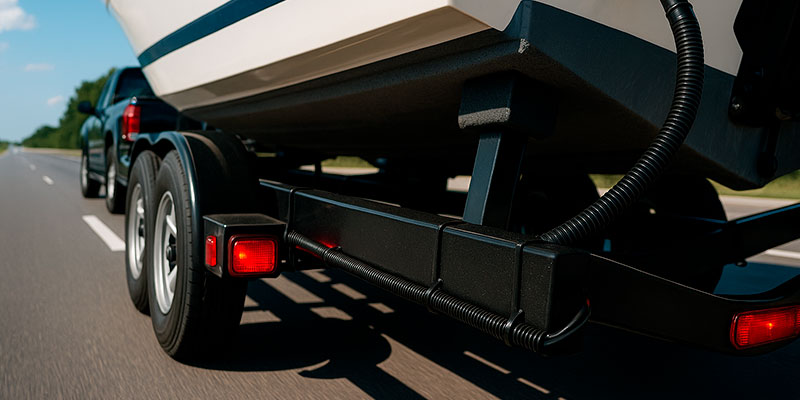
Correctly wiring boat trailer lights is essential for safety and legal compliance. This guide explains how to wire boat trailer lights using marine-grade components, from identifying your connector type to testing and waterproofing the system.
What You’ll Need
- Marine-grade tinned copper wire (16 AWG for markers, 14 AWG for stop/turn)
- LED boat trailer lights (sealed submersible type)
- 4-way or 5-way flat connector (or 7-way adapter if your tow vehicle uses it)
- Waterproof heat-shrink butt connectors and ring terminals
- Heat gun, wire stripper/crimper
- Split loom or conduit, cable clamps/zip ties
- Stainless self-tapping screws, star washers
- Dielectric grease and silicone-lined heat-shrink
- Multimeter or 12V test light
Color Codes and Functions (Typical Flat Connectors)
| Wire Color | Circuit | Notes |
|---|---|---|
| White | Ground | Frame ground and light grounds |
| Brown | Tail/Running | Feeds rear and side marker lights |
| Yellow | Left Turn/Brake | Driver side stop/turn |
| Green | Right Turn/Brake | Passenger side stop/turn |
| Blue (5-way) | Reverse/Brake Lockout | Hydraulic surge brake solenoid or reverse lamps |
Step 1: Identify Your Trailer Light System
Most small boat trailers use a 4-way flat connector. Trailers with hydraulic surge brakes commonly use a 5-way flat so the blue wire can power the brake lockout when reversing. Confirm the connector on your tow vehicle and choose the proper adapter if needed.
Step 2: Plan the Wiring Layout
Route the main harness from the trailer tongue to the rear crossmember. Keep wires inside the frame where possible, away from sharp edges, moving parts, and road debris. Leave slack at hinges or swing-away tongues.
Step 3: Establish a Solid Ground
- Scrape paint to bare metal on the tongue.
- Attach the white ground wire with a stainless screw and star washer.
- Run individual ground leads to each light if the housings are not reliably grounded through their mounts.
Step 4: Run and Protect the Harness
- Feed the harness through split loom or conduit.
- Secure every 30–45 cm with cable clamps or UV-rated zip ties.
- Use grommets where the harness passes through metal.
Step 5: Connect Each Circuit
- Brown wire: splice to feed both left and right tail/running lamps and side markers.
- Yellow wire: left turn/brake lamp input.
- Green wire: right turn/brake lamp input.
- Blue wire (if present): to reverse lights or hydraulic brake lockout solenoid.
- White wire: to each light’s ground lug or to a clean, bare-metal mounting point.
Use waterproof heat-shrink butt connectors for all splices. Crimp firmly, heat until adhesive flows, and tug-test each joint.
Step 6: Install LED Boat Trailer Lights
Choose sealed, submersible LED assemblies rated for immersion. Mount them per manufacturer height/width guidelines. Ensure the license plate light is on the left side and illuminated by the tail/running circuit.
Step 7: Test With the Tow Vehicle
- Connect the trailer plug to the vehicle socket.
- Verify tail/running lights, left and right turn, brake lights, and reverse/lockout (5-way).
- If a circuit fails, check grounds first, then power with a multimeter, then connectors.
Step 8: Waterproof and Corrosion-Proof
- Fill plugs and sockets with dielectric grease.
- Seal open wire ends with adhesive heat-shrink.
- Use tinned copper wire and stainless hardware to resist corrosion.
- Where multiple wires join, use a waterproof junction box mounted above the waterline.
Common Troubleshooting Tips
- Intermittent lights usually mean a weak ground. Re-do the white ground and clean to bare metal.
- Dim lights point to undersized wire or corroded connectors. Upgrade to marine-grade tinned copper and reseal splices.
- One side out: verify the yellow or green run is not cut at a frame hinge or leaf-spring hanger.
- Brake lockout not working: confirm blue wire gets 12V in reverse and solenoid has a good ground.
Quick Compliance Checklist
- All stop/turn/tail lights function and are visible.
- Side marker and clearance lights present where required.
- License plate illuminated on the left.
- Harness secured, protected, and routed away from moving parts.
- Grounds bonded to clean, bare metal with star washers.
- All splices are waterproof heat-shrink type; connectors greased.